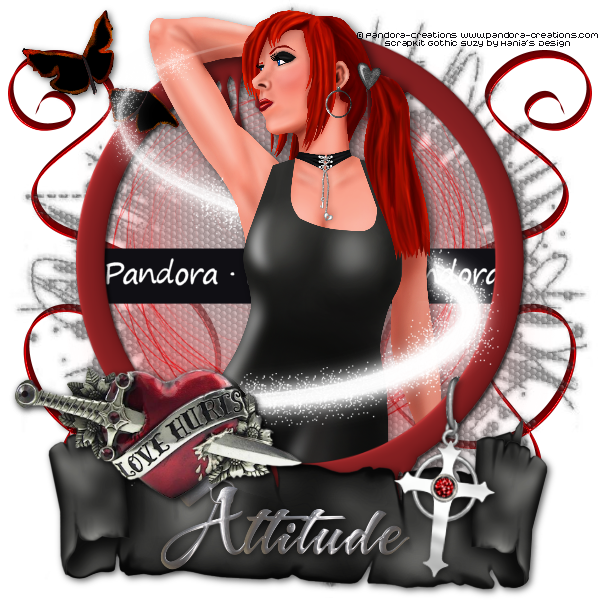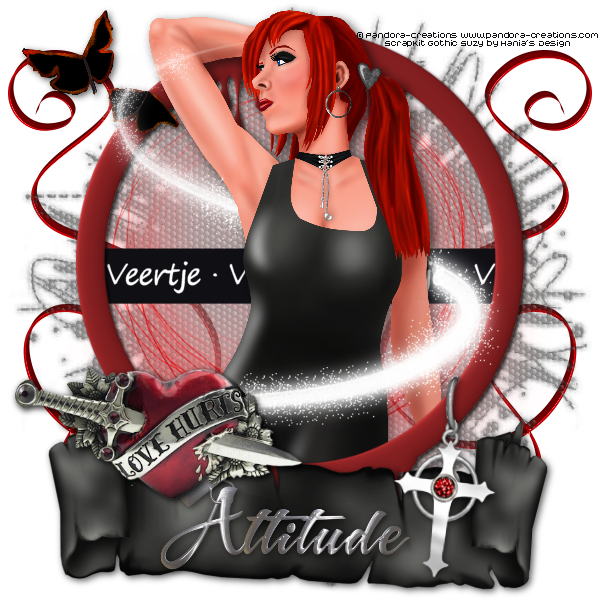
For this tutorial I use my tube Charlotte, you can buy it for only $ 1,50 here:
And the ScrapKit Gothic Suzy from Hania's Design. Visit her blog to know where is avaliable this kit.
Let's go!!
1. Take the elemen 43 and resize to 90% and align it at center
Toma el elemento 43 y redimensionalo al 90%, alinealo al centro.
2. Take the element 10 and resize at 80%, and put under the layer of the frame.
Toma el elemento 10 y redimensionalo al 80%, y ponlo debajo de la capa del marco.
3. Take the tube, and resize it at 30%, we only need the close up, so don't worry if you think it's very big. Put in the center of the canvas, and cut the part that we don't need.
Toma el tubo, y redimensionalo al 30%, solo necesitamos la parte de arriba, asi que no te preocupes si piensas que es demasiado grande. Ponlo en el centro del lienzo y corta la parte que no necesites.
4. Now, take the element 39 and resize it at 25%, and you must situate it on the left site at top, as if the girl is seeing the buterflies.
Ahora, toma el elemento 39 y redimensionalo al 25%, y debes ponerlo en la parte izquierda en la parte de arriba, como si la chica estuviera viendo las mariposas.
5. Take the element 4 and put at the botton of the canvas
Toma el elemnto 4 y ponlo abajo del lienzo.
6. Take now the elemnt 17 and resize at 45%, and put it on the middle of the element 4
Toma ahora el elemento 17 y redimensionalo al 45%, y ponlo en el medio del elemento 4.
7. Take the element 21 and resize at 70%. Put it on the left side, follow the circle.
Toma el elemento 21 y redimensionalo al 70%. Ponlo en el lado izquierdo, siguiendo el circulo.
8. Now take the element 66 and put on the right side, also follow the circle as the previous element. I rotated the element 2º right, to make it more natural.
9. Ahora toma el elemento 66 y ponlo en el lado derecho, tambien siguiendo el circulo como en el elemento anterior. Yo lo rote 2º a la derecha, para que quedara mas natural
10. Take the paper 2 and put it on your creation, under all the layers. Next, add it a mask. I've put a grunge mask, but I think everyone would be good.
Toma el papel 2 y ponlo en tu creacion, debajo de todas las cpas. Luego, añadele una mascara. Yo le puse una mascara grunge, pero creo que cualqueriera estaría bien.
11. Before make more steps, please, be sure that your works is totally clear, I want to mean, if you need to delete something, like parts of the body of the tube to stay inside the circle, or the ring of the cros, please, do it before continue.
Antes de hacer mas pasos, por favor, asegurate de que tu trabajo esta totalmente limpio, quiero decir, si necesitas borrar algo, como partes del cuerpo del tubo para estar dentro del circulo, o la anilla de la cruz, por favor, hazlo antes de continuar.
12. Now, it the time to add drop shadows in the elements 39,4,17,21 and 66. I use these settins 2 - 2 - 65 - 10
Ahora es hora de poner un poco de sombra en los elementos 39, 4, 17, 21 y 66. Yo use estas medidas 2 - 2- 65 - 10
On the tube, use this shadow : 4 - 4- 40 - 15
En el tubo, usa esta sombra: 4 - 4 - 40 - 15
And last, on the frame (element 10), use this settings for shadows: 2 - 2 - 80 - 5
Y por ultimo, en el frame (elemento 10) usa estos valores para la sombra: 2 - 2 - 80 - 5
Remember that the element 43 and the paper with the mask don't have shadows.
Recuerda que el elemento 43 y el papel con la mascara no tienen sombra.
13. Now, it's time for small details: Add the element 75 around the tube, and delete what you don't want to see.
Ahora es tiempo para los pequeños detalles: añade el elemento 75 alrededor del tubo y borra lo que no quieres ver.
14. And last, the element 80 put under all the layers. Put it in the left side and duplicate the layer, and make mirror. Situate the duplicate in the right side.
Por ultimo, el elemento 80 ponlo debajo de todas las capas. Ponlo en el lado izquierdo y duplica la capa, y haz espejo. Situa el duplicado en el parte derecha.
Finally, add the credits of the tube and the kit, and put the name, as I've done.
Finalmente, añade los creditos del tube y del kit, y pon tu nombre como yo he hecho.

Tutorial realizado por Pandora-Creations el 22 de Febrero de 2013. No se permite la copia parcial o total de este tutorial sin consentimiento expreso y escrito de la autora (yo). Si tienes dudas, mandame un correo!!!


No hay comentarios:
Publicar un comentario