Mostrando entradas con la etiqueta Tutoriales Pandora-Creations. Mostrar todas las entradas

domingo, 30 de junio de 2013

Tutorial - From Hell (Desde el Infierno) (Spanish)


Tutorial CT para Hania's Designs y LadyMishka.

Para este tutorial he usado el tube "Vampire Lulu (White Moon)" de  LadyMishka. Por favor, compra el tube en Pics For Design AQUI
Tambien use el fantastico kit "Devil's Bride", de Hania's Design. Puedes encontrarlo en Pics For Design AQUI o Scraps And the City AQUI

Para este tutorial solo necesitas el kit, el tube y una mascara de tu elección. You use una mascara de AQUI. La fuente usada es "Olho de Boi"

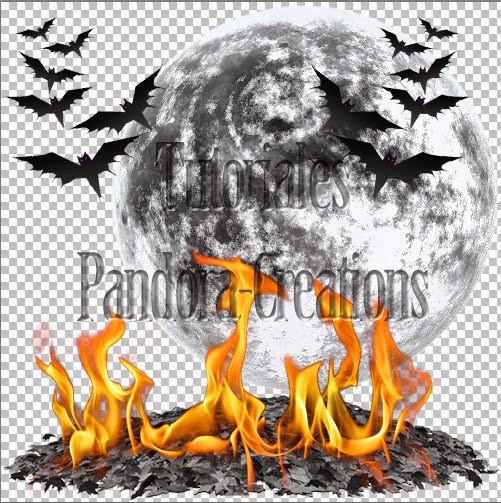
Empecemos. Abre tu carpeta del kit, elementos, y vamos a poner los siguientes elementos en un lienzo transparente, tamaño 500X500 pix.

elemento 108
elemento 42 (duplicar y espejo)
elemento 27
elemento 57

Por favor, sigue la siguiente vista previa como una referencia para las posiciones:


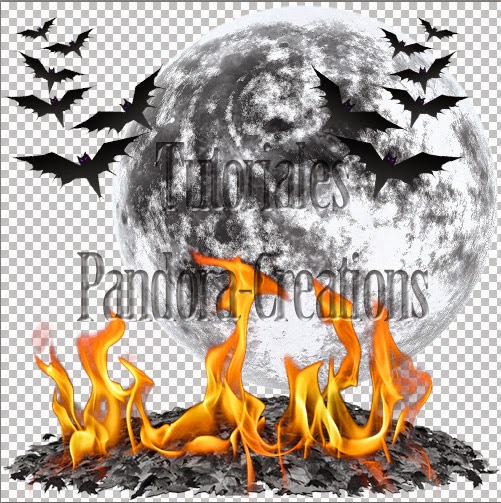
El siguiente paso es poner los siguientes elementos:
 
elemento 103
elemento 10 (duplicar, redimensionar al 55% y rotar 40º a la derecha)
elemento 105

Sigue la previa como referencia:


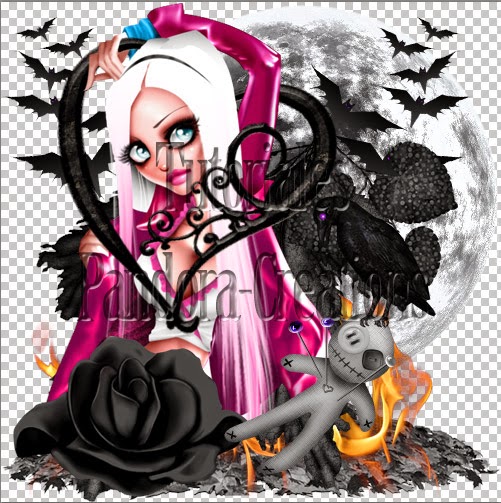
Ahora es hora de poner el tubo, mezclandolo con la creacion de la manera que quieras. Puedes mirar mi creacion para tener una referencia si quieres. Yo suelo duplicar el tubo y usar la goma de borrar en las areas que quiero suprimir :D

Tambien ponemos los elementos 36, 1 y 19.


Pon el papel 6 bajo tu ultima capa y combinala con la mascara de tu eleccion.

Despues, pon tu nombre, y muy importante, los créditos en el tag, y ya esta listo!!!


Tutorial realizado por Pandora-Creations en junio de 2013. Por favor, no robes mi trabajo. Si quieres seguir el tutorial y enviarme tu trabajo, puedes hacerlo al correo electronico que muestro en mi blog. Si quieres mostrar este tutorial en tu blog o en tu foro, por favor, preguntame primero.
Gracias, disfruta con tu PS / PSP !!!

Tutorial - From Hell (English)


Tutorial CT for Hania's Designs and LadyMishka.

For this tutorial I use the tube "Vampire Lulu (White Moon)" from LadyMishka. Please, purchase the tube at Pics For Design HERE
Also I use the awesome kit "Devil's Bride", by Hania's Design. You can find the the kit here on Pics For Design HERE or Scraps And the City HERE

For this tutorial only need the kit, the tube and 1 mask of your choice. I use a mask from here. The font used is "Olho de Boi"

Lets go. Open the folder of your kit, elements, and we going to put the following elements on a transparent canvas, size 500X500 pix.

element 108
element 42 (duplicate and mirror)
element 27
element 57

Please, follow the next preview like a reference position:


Next step is put the follow elements:

element 103
element 10 (duplicate, resize at 55% and rotate 40º right)
element 105

Follow this preview as reference


Now is time to put the tube, mixing with the creation as you want. You can look my creation to have a reference if you want. I usually duplicate the tube an use the eraser in the areas that I want to delete :D

And also put the elements 36, 1 and 19.


Put the paper 6 under your last layer and combine with the mask of your choise.

Later, put your name, and very important, the credits on the tags, and is ready!!!


Tutorial made by Pandora-Creations on jun of 2013. Please, don't steal my work. If you want to follow the tut and send me your work, you can do it at the email that I show on my blog. If you want to show this tutorial on your blog or forum, please, ask me first.
Thank you, enjoy with your PS / PSP !!!

Tutorial Alabaster Angel (ENGLISH VERSION)


Tutorial CT for P-O Concept, and myself.

For this tutorial we going to use the awesome kit ALABASTER & SHADOW, by P-O Concept. You can find the the kit here on SATC
Also, I use my tube, ARIES + Angel, Angel version of course. Please, take a look on SATC.

For this tutorial only need the kit, the tube and 2 differents mask: The mask called "beckymask 038" by Becky from SecretsoftheImagination. The web is donw, but if you search on google, I'm sure that you can find it easily. The other one is the mask called "Avital_MaskVol1_FreeM2" by avital Designs from http://avitalscrap.blogspot.com (can find the mask on this store for free). The font used is "Birch Std"

Lets go. Open the folder of your kit, elements, and we going to put the following elements on a transparent canvas, size 600X600 pix.

element 24
element 1
element 2
element 43
element 35
element 36
element 46
element 51


Please, follow the next preview like a reference position:


Next step is put the close up tube behind the windows blend mode: screen
duplicate the tube layer and put it on the mode: luminosity - opac. 50%
paper 12 behind the tube

Follow this preview as reference


Now is time to put the tube full body - and get shadows 40 - 3 - 0 - 10

And also put the element 54, I think is so cute and tender :D


Copy all and paste as new layer

resize the image (ControlT) at 95%


And now, we going to play with Effects.
Filter - Blur - Gaussian blur - 37
New layer  - blend mode - Overlay (yes, only the transparent layer), and put this layer under the layer of the gaussian blur.
Now, merge this 2 layer with ControlE (blur and transparent)

Put the paper 1 under your last layer and combine with the Becky mask.
Later, put the paper 10 and apply the mask of Avital.

Later, put your name, and very important, the credits on the tags, and is ready!!!


Tutorial made by Pandora-Creations on jun of 2013. Please, don't steal my work. If you want to follow the tut and send me your work, you can do it at the email that I show on my blog. If you want to show this tutorial on your blog or forum, please, ask me first.
Thank you, enjoy with your PS / PSP !!!

Tutorial Angel de Alabastro (SPANISH)


Tutorial CT para P-O Concept, y para mi misma.

Para este tutorial vamos a usar el fantastico kit  ALABASTER & SHADOW, de P-O Concept. Puedes encontrar este kit aqui, en SATC
Tambien use mi tubo, ARIES + Angel, la version Angel por supuesto. Por favor, hecha un vistazo en SATC.

Para este tutorial solo necesitas el kit, el tubo y 2 mascaras diferentes. La maskara llamada  "beckymask 038" de Becky de SecretsoftheImagination. La web esta caida, pero si buscas en google, estoy segura de que la encontraras facilmente. La otra mascara se llama "Avital_MaskVol1_FreeM2" de avital Designs de http://avitalscrap.blogspot.com (puedes encontrar la mascara en esta tienda gratis). La fuente usada es "Birch Std"

Empecemos. Abre la carpeta con tu kit, elementos, y vamos a poner los siguientes elementos en un paño transparente, tamaño 600x600 pix.

elemento 24
elemento 1
elemento 2
elemento 43
elemento 35
elemento 36
elemento 46
elemento 51

Por favor, sigue la siguiente vista previa como una referencia para la posicion:


El siguiente paso es poner el close up detras de la ventana, modo de la capa: trama
Duplica la capa del tubo y ponlo en modo luminosidad - opacidad 50%
añade el papel 12 tras el tubo.

Sigue esta imagen como referencia


Ahora es hora de poner el tubo de cuerpo entero, y añadir sombra con los valores 40 - 3 - 0 - 10

Y pon tambien el elemento 54, es tan cute y tierno!! :D


Selecciona todo, copia todo y pega como una nueva capa
Redimensionala al 65 con Control T


Y ahora, vamos a jugar con los efectos.
Filtro - Desenfoque - Desenfoque Gaussiano - radio 37
Nueva capa - modo: superponer (si, solo la capa transparente), y ahora pon la capa bajo la capa del desenfoque.
Ahora, Combina las 2 capas con Control E (la del ruido y la transparente con el modo superponer)

Ahora pon el papel 1 bajo tu ultima capa y combina con la máscara Becky mask
Despues, pon el papel 10 y añade la máscara de Avital.

Por ultimo, pon tu nombre, y muy importante, los creditos en el tag, y listo!!!


Tutorial realizado por Pandora-Creations en junio de 2013. Por favor, no robes mi trabajo. Si quieres seguir el tutorial y enviarme tu trabajo, puedes hacerlo al correo electronico que muestro en mi blog. Si quieres mostrar este tutorial en tu blog o en tu foro, por favor, preguntame primero.
Gracias, disfruta con tu PS / PSP !!!

viernes, 1 de marzo de 2013

Tutorial EmoHolic (Español)

Found the English version HERE
 

Este tutorial esta hecho y escrito por mi, con mis propias ideas. Cualquier semejanza con otro tutorial es puramente coincidencia.

Elementos Necesarios
 Tubo de tu eleccion. Yo he usado el tubo Tiffany, de Lady Mishka.
Puedes comprar su trabajo  aqui
 Scrapkit: Emo Tiffany, de Hania's Designs
Y puedes comprar su kit aqui
 Un WordArt gratuito que hice para mi proyecto especial 52 semanas.
Puedes encontrarlo aqui
Fuente a tu gusto. Yo estoy usando la fuente llamada Mon Amour Script Art
No requiere pluggins

Elementos usados del kit

Element 1, Element 2 , Element 3, Element 5,
Element 10, Element 14, Element 15, Element 21
Element 24, Element 47, Element 50,
Element 54, Element 61, Element 70
Papeles usados del kit
Ninguno

Vamos a empezar

Abrimos un paño transparente de 600x600
Elemento 24. Ponlo en el lado izquierdo. Duplicar-imagen-espejo. Ponlo en el lado derecho.
Elemento 70 - redimensionar. Ajusta el tamaño y ponlo en el centro.
Elemento 47, ponlo detras de todos ellos.
Mira esta imagen como referencia.

 
Ahora, añadimos los siguientes elementos. Redimensionar si piensas que es necesario.
Elemento15
Elemento  1
Elemento10
Elemento  14
Elemento5
Por favor, mira mi composición como referencia para tu trabajo. 


Ahora es hora de añadir el tubo, mira


Tiempo para añadir nuevos elementos, pero ahora, deben estar por encima del tubo. Estos elementos son:
Elemento50
Elemento  3
Elemento21
Elemento  2
Elemento61
Elemento  54
De nuevo, por favor, sigue mi composicion


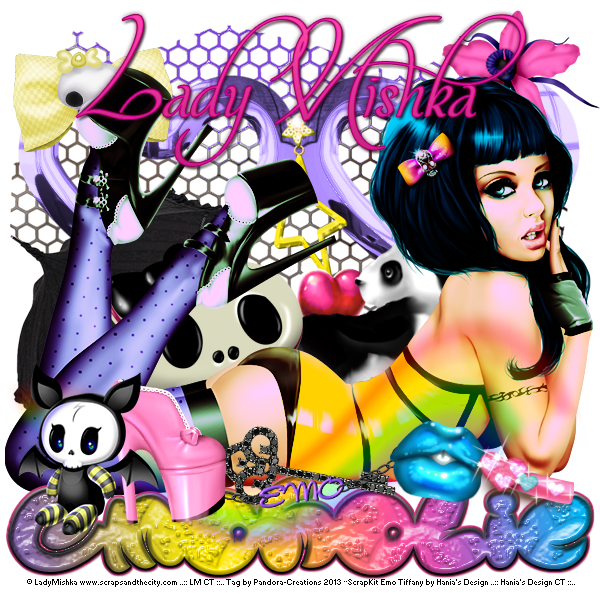
Finalmente, necesitamos añadir el wordart EmoHolic. Debes ponerlo por debajo del tubo. Por favor, mira la composicion ;)


Añade tu nombre, creditos e información de copyrights, y ya esta hecho!!

Debes recordar que esto es solo unas cuantas instrucciones, pero tu resultado puede ser cambiado y original dependiendo del tubo que uses, mira, otra version!!


Tutorial realizado por Pandora-Creations el 1 de marzo de 2013. No se permite copiar parcial o totalmente sin consentimiento expreso de la autora. Contacta conmigo para cualquier duda o para enviarme tus resultados!!!! Gracias!!

Tutorial EmoHolic (English)

Encuentra la version en español AQUI


This tutorial was made and written by my own ideas any resemblance to other tutorials is purely coincidental.

Supplies Needed
 Tube of choice. I'm using the tube Tiffany, by Lady Mishka
You can purchase her work  here
 Scrapkit: Emo Tiffany, by Hania's Designs
You can purchase her kit here
 A freebie WordArt that I make for my special Project 52 weeks.
You can found it here
Font of choice. I'm using font called Mon Amour Script Art
No plugins needed.

Elements used from kit

Element 1, Element 2 , Element 3, Element 5,
Element 10, Element 14, Element 15, Element 21
Element 24, Element 47, Element 50,
Element 54, Element 61, Element 70
Papers used from kit
None

Lets' get Started 
Open new raster 600x600
  Element 24. Put in the left side. Duplicate - image - mirror - put on the right side.
Element 70 - resize it. Adjust size and put in the middle
Element 47 put behind all of them.
Look this image for reference


Now, add the followin elements. Resize them if you think is necesary
Element 15
element 1
Element 10
Element 14
Element 5
Please, look my composition as reference for the work.


Now is the time to add the tube, look


Time to add new elements, but now, they must be in front of the tube. These elements are:
Element 50
Element 3
Element 21
Element 2
Element 61
Element 54
Again, please follow my composition:


Finally, we need add the wordart EmoHolic. You must put below the tube. Please, look my composition ;)


Add your name, credits and copyright info and we are done! 


 You must remember that this is only a few instructions, but your result can be change and original depending the tube you use, look another variation!!!


Tutorial made ​​by Pandora-Creations on March 1, 2013. Not copy whole or in part without the express consent of the author. Contact me for any questions or to send your results!! Thank you!

viernes, 22 de febrero de 2013

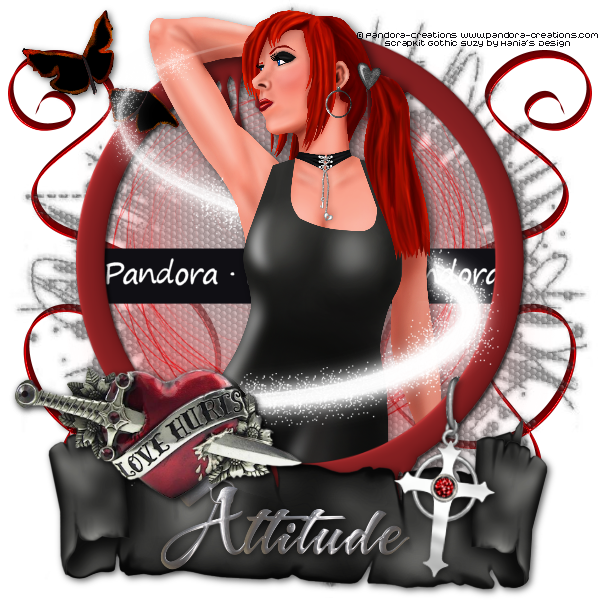
PTU Tutorial Attitud - English/Spanish


For this tutorial I use my tube Charlotte, you can buy it for only $ 1,50 here:
And the ScrapKit Gothic Suzy from Hania's Design. Visit her blog to know where is avaliable this kit.

Let's go!!

1. Take the elemen 43 and resize to 90% and align it at center
Toma el elemento 43 y redimensionalo al 90%, alinealo al centro.

2. Take the element 10 and resize at 80%, and put under the layer of the frame.
Toma el elemento 10 y redimensionalo al 80%, y ponlo debajo de la capa del marco.

3. Take the tube, and resize it at 30%, we only need the close up, so don't worry if you think it's very big. Put in the center of the canvas, and cut the part that we don't need.
Toma el tubo, y redimensionalo al 30%, solo necesitamos la parte de arriba, asi que no te preocupes si piensas que es demasiado grande. Ponlo en el centro del lienzo y corta la parte que no necesites.

4. Now, take the element 39 and resize it at 25%, and you must situate it on the left site at top, as if the girl is seeing the buterflies.
Ahora, toma el elemento 39 y redimensionalo al 25%, y debes ponerlo en la parte izquierda en la parte de arriba, como si la chica estuviera viendo las mariposas.

5. Take the element 4 and put at the botton of the canvas
Toma el elemnto 4 y ponlo abajo del lienzo.

6. Take now the elemnt 17 and resize at 45%, and put it on the middle of the element 4
Toma ahora el elemento 17 y redimensionalo al 45%, y ponlo en el medio del elemento 4.

7. Take the element 21 and resize at 70%. Put it on the left side, follow the circle.
Toma el elemento 21 y redimensionalo al 70%. Ponlo en el lado izquierdo, siguiendo el circulo.

8. Now take the element 66 and put on the right side, also follow the circle as the previous element. I rotated the element 2º right, to make it more natural.
9. Ahora toma el elemento 66 y ponlo en el lado derecho, tambien siguiendo el circulo como en el elemento anterior. Yo lo rote 2º a la derecha, para que quedara mas natural

10. Take the paper 2 and put it on your creation, under all the layers. Next, add it a mask. I've put a grunge mask, but I think everyone would be good.
Toma el papel 2 y ponlo en tu creacion, debajo de todas las cpas. Luego, añadele una mascara. Yo le puse una mascara grunge, pero creo que cualqueriera estaría bien.

11. Before make more steps, please, be sure that your works is totally clear, I want to mean, if you need to delete something, like parts of the body of the tube to stay inside the circle, or the ring of the cros, please, do it before continue.
Antes de hacer mas pasos, por favor, asegurate de que tu trabajo esta totalmente limpio, quiero decir, si necesitas borrar algo, como partes del cuerpo del tubo para estar dentro del circulo, o la anilla de la cruz, por favor, hazlo antes de continuar.

12. Now, it the time to add drop shadows in the elements 39,4,17,21 and 66. I use these settins 2 - 2 - 65 - 10
Ahora es hora de poner un poco de sombra en los elementos 39, 4, 17, 21 y 66. Yo use estas medidas 2 - 2- 65 - 10

On the tube, use this shadow : 4 - 4- 40 - 15
En el tubo, usa esta sombra: 4 - 4 - 40 - 15

And last, on the frame (element 10), use this settings for shadows: 2 - 2 - 80 - 5
Y por ultimo, en el frame (elemento 10) usa estos valores para la sombra: 2 - 2 - 80 - 5

Remember that the element 43 and the paper with the mask don't have shadows.
Recuerda que el elemento 43 y el papel con la mascara no tienen sombra.

13. Now, it's time for small details: Add the element 75 around the tube, and delete what you don't want to see.
Ahora es tiempo para los pequeños detalles: añade el elemento 75 alrededor del tubo y borra lo que no quieres ver.

14. And last, the element 80 put under all the layers. Put it in the left side and duplicate the layer, and make mirror. Situate the duplicate in the right side.
Por ultimo, el elemento 80 ponlo debajo de todas las capas. Ponlo en el lado izquierdo y duplica la capa, y haz espejo. Situa el duplicado en el parte derecha.

Finally, add the credits of the tube and the kit, and put the name, as I've done.
 Finalmente, añade los creditos del tube y del kit, y pon tu nombre como yo he hecho.


Tutorial realizado por Pandora-Creations el 22 de Febrero de 2013. No se permite la copia parcial o total de este tutorial sin consentimiento expreso y escrito de la autora (yo). Si tienes dudas, mandame un correo!!!

jueves, 21 de febrero de 2013

Tutorial Candy Girl


Para este tutorial he elegido este bello tubo de Lady Mishka. Una preciosidad solo disponible en Scrap and the City (SATC) con compras superiores a $5, ya que no esta a la venta. Tiene un monton de capas, elige tu combinacion!!!!

TUTORIAL CANDY GIRL

  1. Abrimos un lienzo de 600x600 de fondo transparente


  1. Añadimos una forma que nos guste. Puede ser solida o hueca, el caso es rellenarla despues con un color solido.
  2. Una vez relleno, nos vamos a Filtros – Xero – Soft Vignette y le damos estos valores


  1. Ahora en el borde de la forma, o en el resto de la forma que nos queda, le damos una textura punteada, de esta manera: Efectos – Textura – Textil, y le damos este valor


  1. Como toque especial, a este borde o relleno, vamos a darle una sombra gruesa, para que quede con relieve, Vamos a Efectos- Efectos 3d- Aplicar Sombra, con estos valores:


  1. Ahora le damos sombra al tubo que hemos elegido, de la misma manera que el paso anterior pero con estos valores:


  1. Ahora le vamos a poner una máscara. En mi caso, he elegido una con forma redonda, para que solo se vea un poco el borde resplandeciente, en concordancia con la forma elegida, por lo que quedaria de esta manera:


  1. Añadimos los creditos y el nombre, y ya esta listo!!!


Aqui te dejo otro ejemplo, esta vez añadiento mas objetos de scrap, para que veas que pueden añadirse elementos al gusto y quedaria igual de bello, o incluso mas!!!

Para este otro ejemplo, he usado el tubo emo de Celine PinUp, a conjunto con su Scrap, que puedes obtener aqui
http://scrapsandthecity.com/store/index.php?main_page=product_info&cPath=339_195_293&products_id=3361


Tutorial realizado por Pandora-Creations el 20 de Febrero de 2013. No se permite la copia parcial o total de este tutorial sin consentimiento expreso y escrito de la autora (yo). Si tienes dudas, mandame un correo!!!


Safe Creative #1302204628851